
THIS POST IS NOW OUT OF DATE. Please see the updated version which warns against using Topaz Labs Denoise AI. For integrity, all the links to the product have been removed from this post.
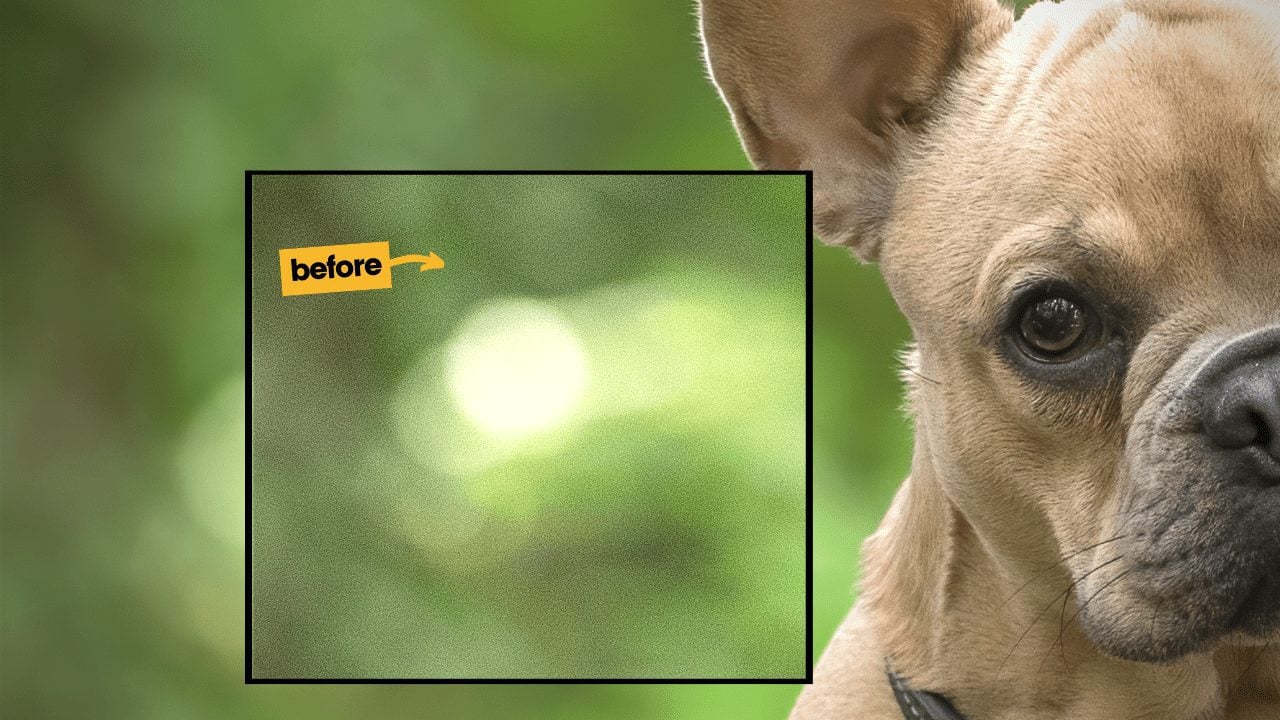
This video was inspired by a bazillion posts in the Facebook Group about issues, questions or disasters happening when using DeNoise AI. It’s an odd tool to work with and it’s SO easy to over sharpen, over de-noise and over process. I figured I’d pop a quick video together on how I use Topaz Labs DeNoise AI, the settings I personally use and uncover a couple of little tricks to make it work better for you.
The video on this topic is here:
Instead of walking through all of the steps in the little tutorial here, I want to just focus on the core things:
1. Connect as plug-ins
First things first, the best way to use this tool is to have it hooked up to your editing programs as plug-ins/filters. In Lightroom, it’s an “open in…” plugin and in Photoshop CC it’s within the “Filter” menu on the top navigation.
I’m not going to pop the how-to for this step here, because it may change and I don’t want this to be wrong or completely out of date in a week, so I will just link to the Topaz Labs help guides for this here:
With that done, it’s time to explore the actual system itself…
2. Know the different modes
Within the current version of DeNoise AI that I have, there are three “mode” options. In my understanding, the use-cases of these are as follows:
- DeNoise: The “normal” solution that should work for most cases, Auto will be too strong (see next section)
- AI Clear: Theoretically best for colour noise but I’ve never used this on a final image
- Low Light: For use in higher noise situations or with fluffy coats (like Alfies around his head). Reduces detail. Use on a super super low setting
I’ve never used AI Clear, but regularly switch between DeNoise and Low Light depending on the coat of the dog and the level of noise in shot.
3. Don’t overdo it!
The “Auto” settings always overcook the situation for me! Way too much sharpening, the introduction of artefacts and other weird things tend to happen when Auto is running the show.
My advice would be to turn both sliders right down – like 2 or 3 or 4. Then, increase slowly in little sections until your noise is removed appropriately.
Keep sharpening set low, under 10 is usually more than enough! You can always do a high pass sharpen later.
4. Mask when needed
Sometimes you want the details back in places and with some subjects, you lose all coat detail completely (*achem* Horses…) so in these situations, it’s time to mask.
Using the mask button will give you a white mask. That means that DeNoise is effecting the whole image evenly. Use the Sub (black) and Add (white) brushes to regain detail where needed in a targeted way.
You can invert the masks and switch on and off the overlay. You can also adjust your brush settings to suit the area being targeted.
Awesome!
That’s kind of the run down on my list of tips for this tool, I think this should answer all of the questions I’ve seen about it (I hope!). If you have any others, please let me know!