
As promised after the November Challenge Review Video, today is a focus on a straightforward and relatively simple eye edit that you can do in Photoshop to retouch eyes and make them pop. This is the exact same method that has been taught out for a long time so I want to ensure you have it here for reference.
There is a video on this, and I would recommend following it, that is available here:
Please note, the keyboard shortcut to change your brush size uses Control, not Command!
Let’s run through the steps:
To edit eyes in Photoshop you will need to have Photoshop open and a working knowledge of masks, adjustment layers and general layers too.
Step 1: Set the curve
The first part of the process is to create a Curves Adjustment layer and set the curve to look like this:
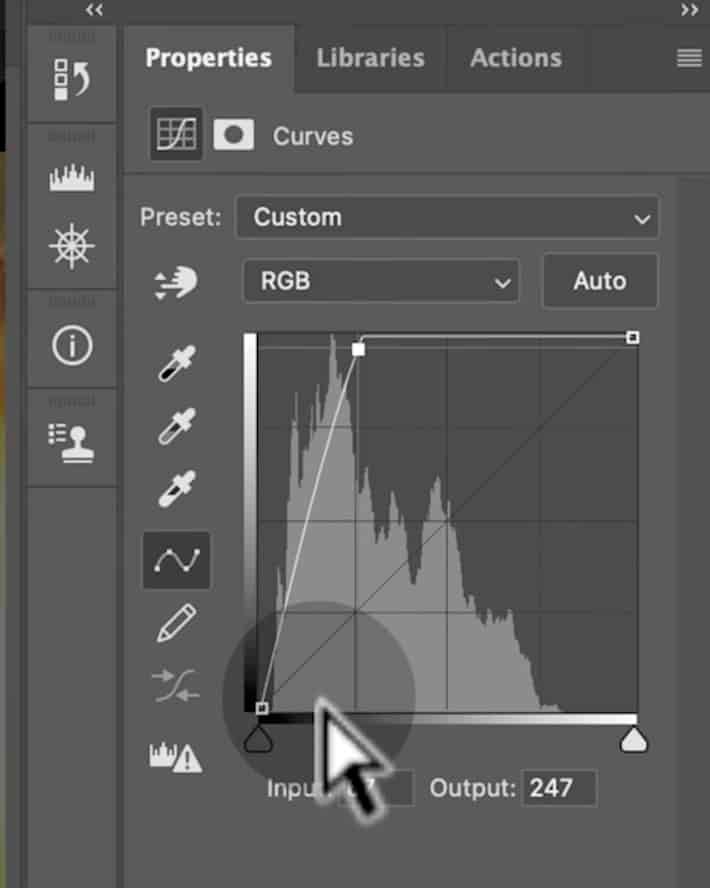
Next, grab the mask on the curves layer and invert it so that it is completely black. You can use command+I for this, or fill the mask with black paint.
Step 2: Enhance the Iris
Grab a white brush of the “soft round” variety and set the opacity and flow of the brush to 100%.
Change the size of the brush to be about the size of the subject’s eyeball and then line up the centre of the brush with the centre of the eye. Next, move the brush down to end up with the centre of it on the lower lid-line.
Here, press once to add a dab of this effect there. Go to the other eye and add a dab in the same location there.
Step 3: Remove from adjacent areas
At this stage, you have an exceptionally harsh brightening effect in a circle on the subjects eye and lower lid-line which looks horrendous.
Flip your palette so that you now have a black brush.
Harden the brush up to around 50% and then remove the effect from everywhere outside of the eyeball.
Make the brush slightly smaller and remove the effect from the pupils in the eye.
Now you should just have a super bright iris (the coloured bit in eyes) and no effect anywhere else.
Step 4: Enhance catchlights
Flip your brush back to white, and make it teeny tiny and quite hard. At this point, you need to match the size of the brush to the size of the detail in the catchlights, the light reflected part usually at the top of the eyes.
Carefully trace the catchlights in the eye with this brush. They should become very, very light indeed.
Step 5: Adjust opacity
Next, just bring down the opacity of the curves adjustment layer to around 30-40% or wherever suits the subject in the image. That’s it, job done!
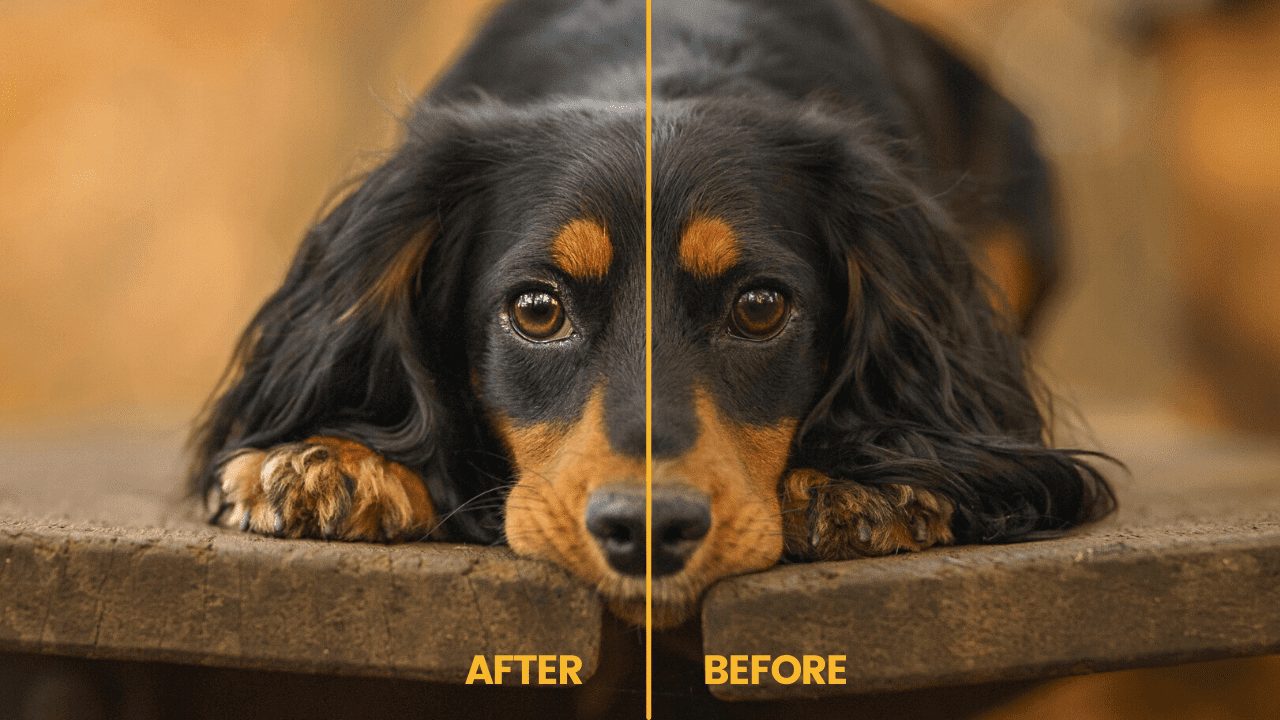
Examples of images edited using this technique:


Thx for amazing video! Is it gonna be different if we just use dodge brush?