
This weeks video is all about Curves and I want to walk through some functionality in this blog post too. To skip ahead and look at the Photoshop Curves video straight away, simply hit play on this:
Let’s look at curves in general.
What are Curves in Photoshop?
“Curves” is literally just an adjustment that you can apply to an image. Think of when you adjust the exposure, the white balance and other basic bits and pieces, Curves is like that, but on steroids. It allows you to have minute control over pixel brightness and colour in one powerhouse of a panel.
When you apply curves, you can do it globally (destructively), or sensitively (non-destructively). When you apply curves non-destructively, you use what’s called an Adjustment Layer. This little helper splits out the adjustment from the actual image, allowing you to control where and how it impacts the image itself using masks and blend modes. If this is a foreign language, that’s ok – check out this handy resource here.
How to get a Curves adjustment layer
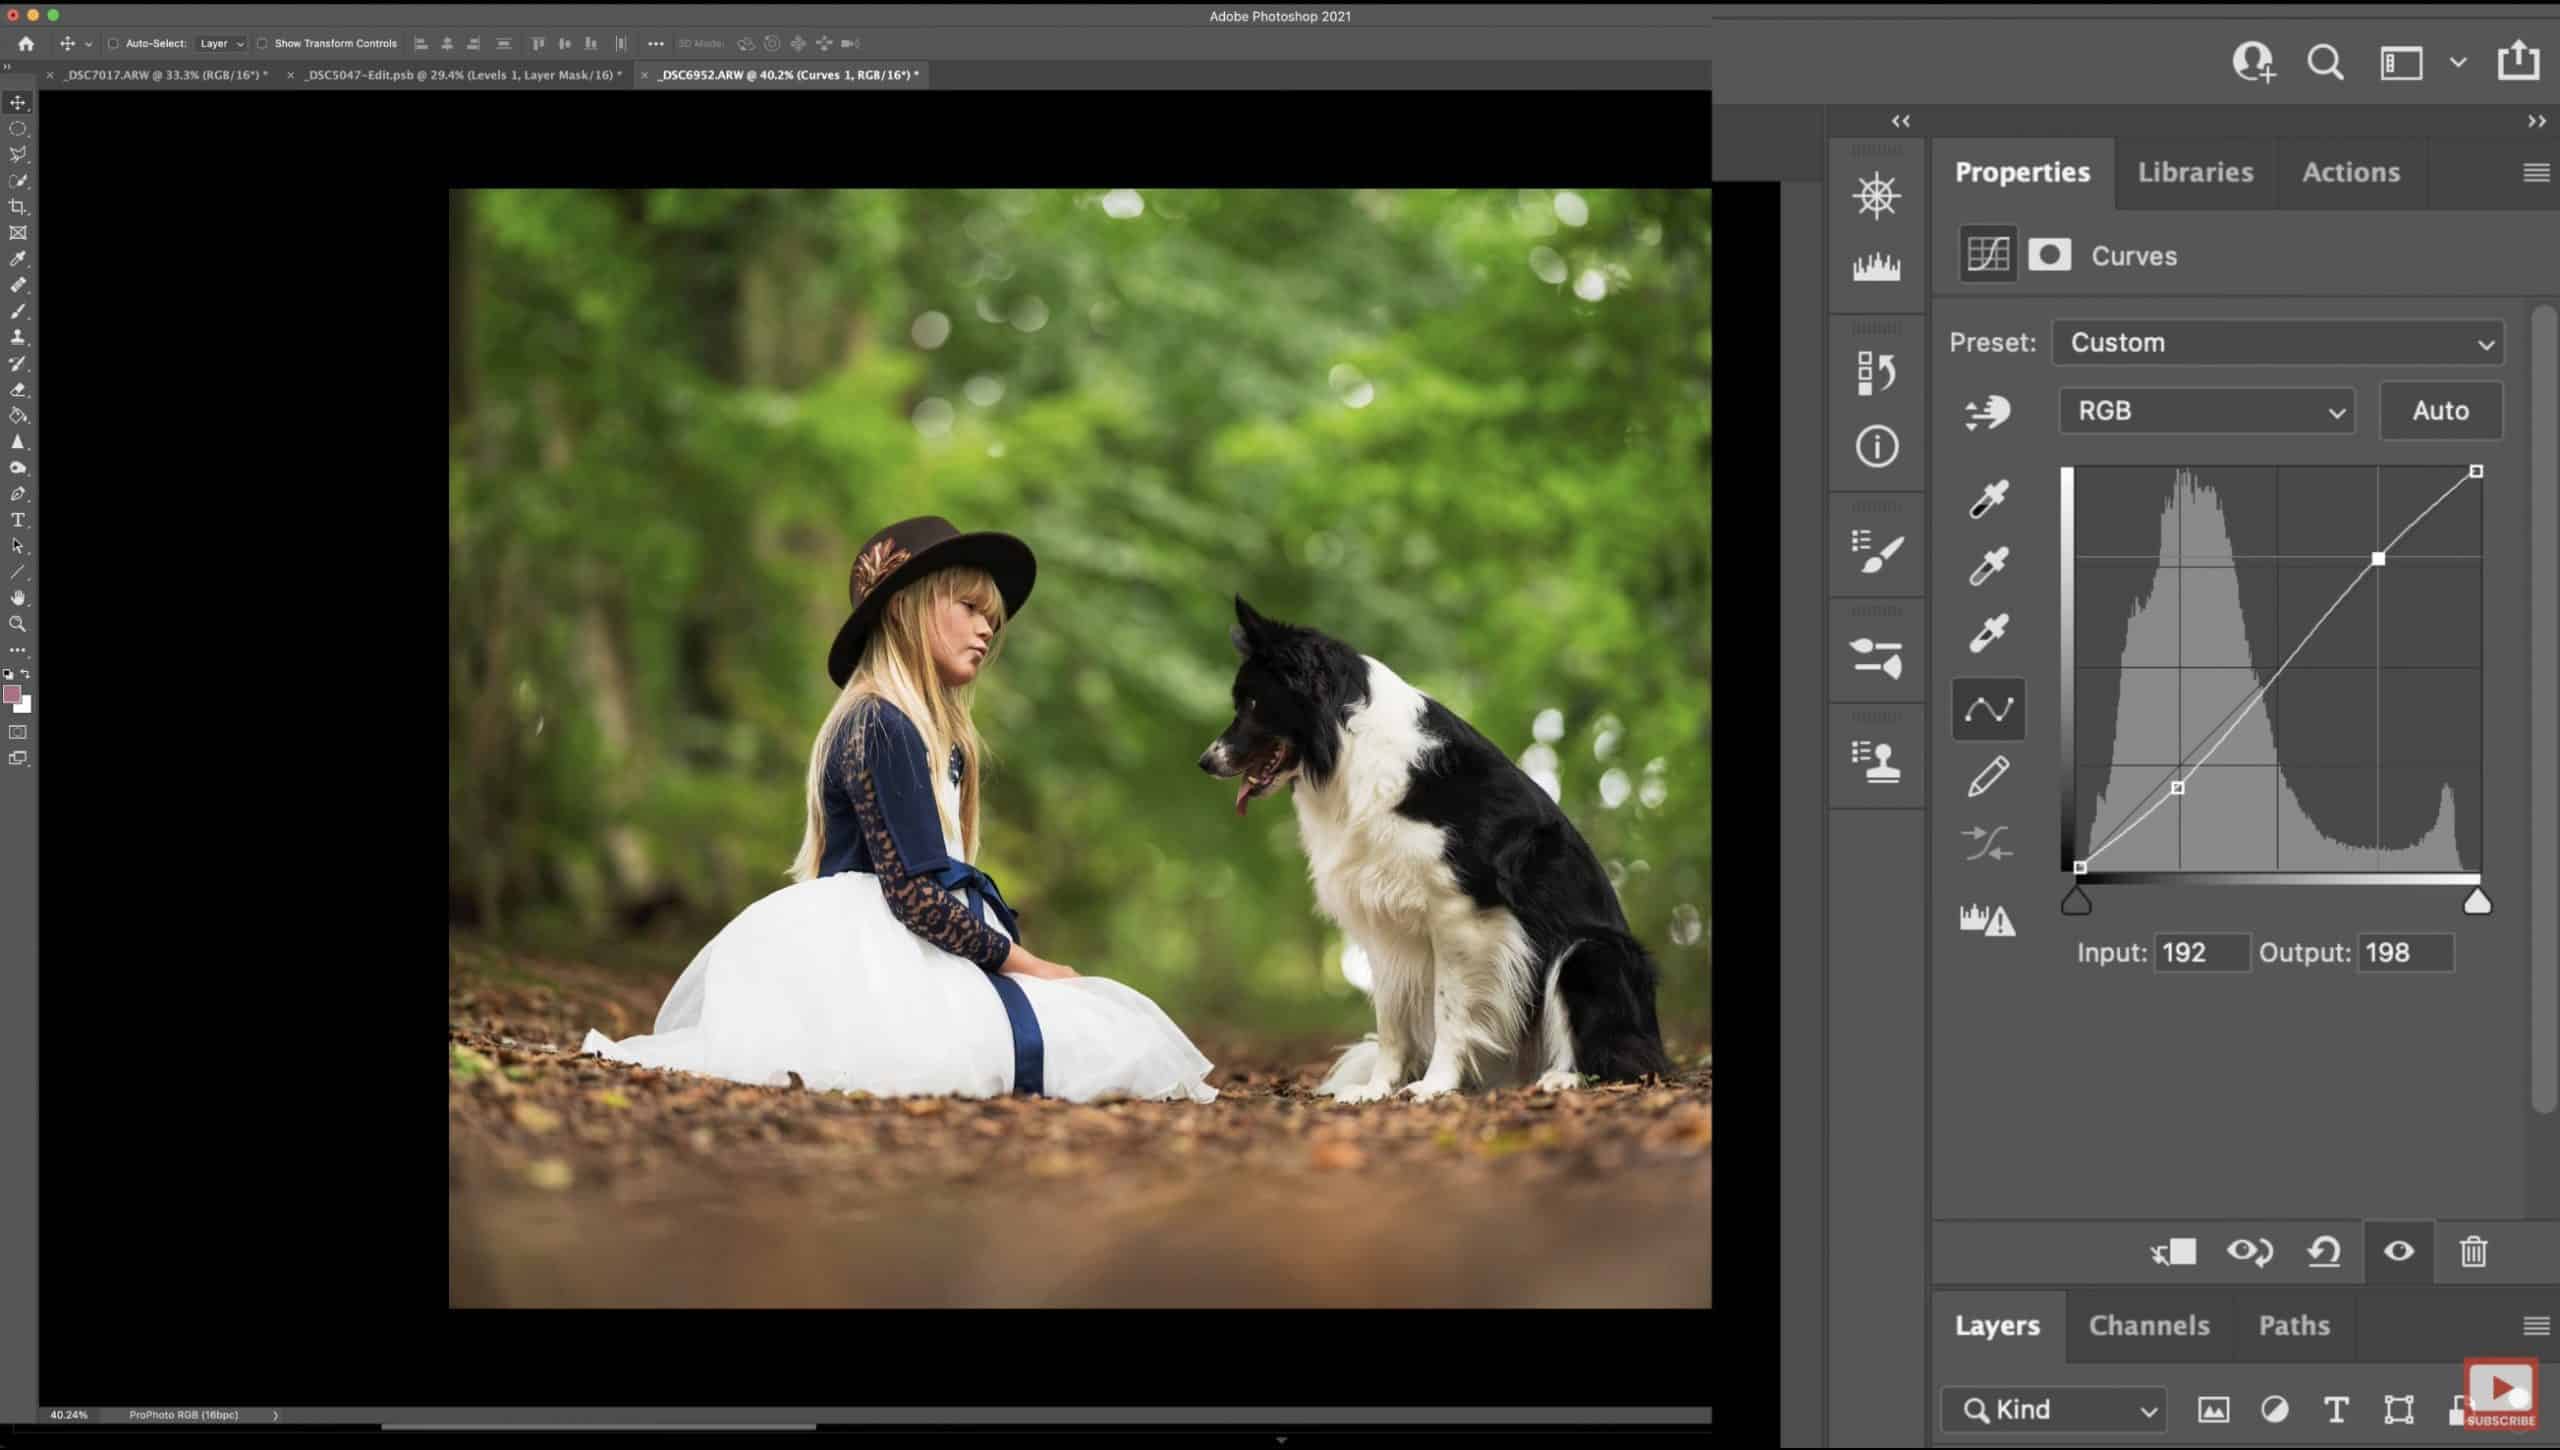
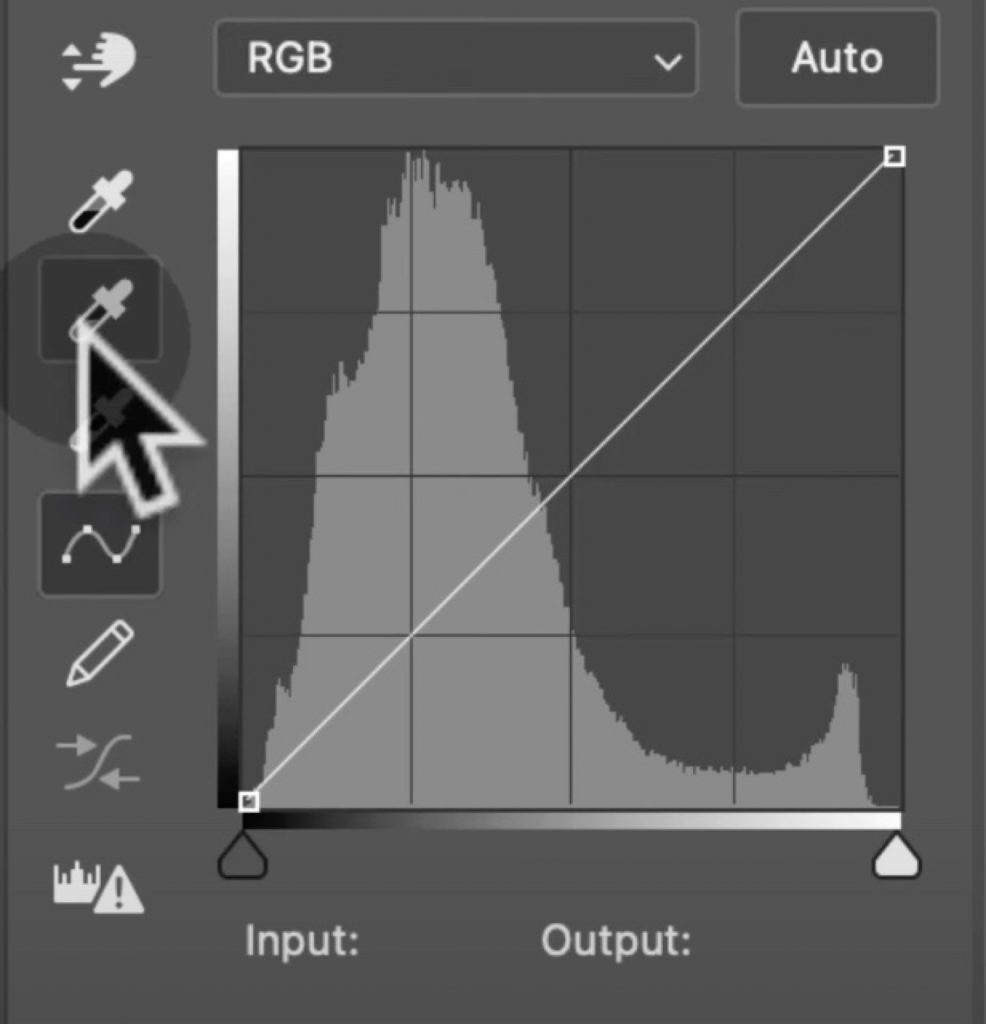
To get a curves adjustment layer you need an image open in Photoshop and you need to be able to see the Layers panel. If you can’t see the Layers panel, go Window -> Layers.
At the bottom of this panel is an adjustment layer icon – it’s a circle cut in half. Click on that and then select Curves from the list.
Et voila, you have a curves adjustment layer.
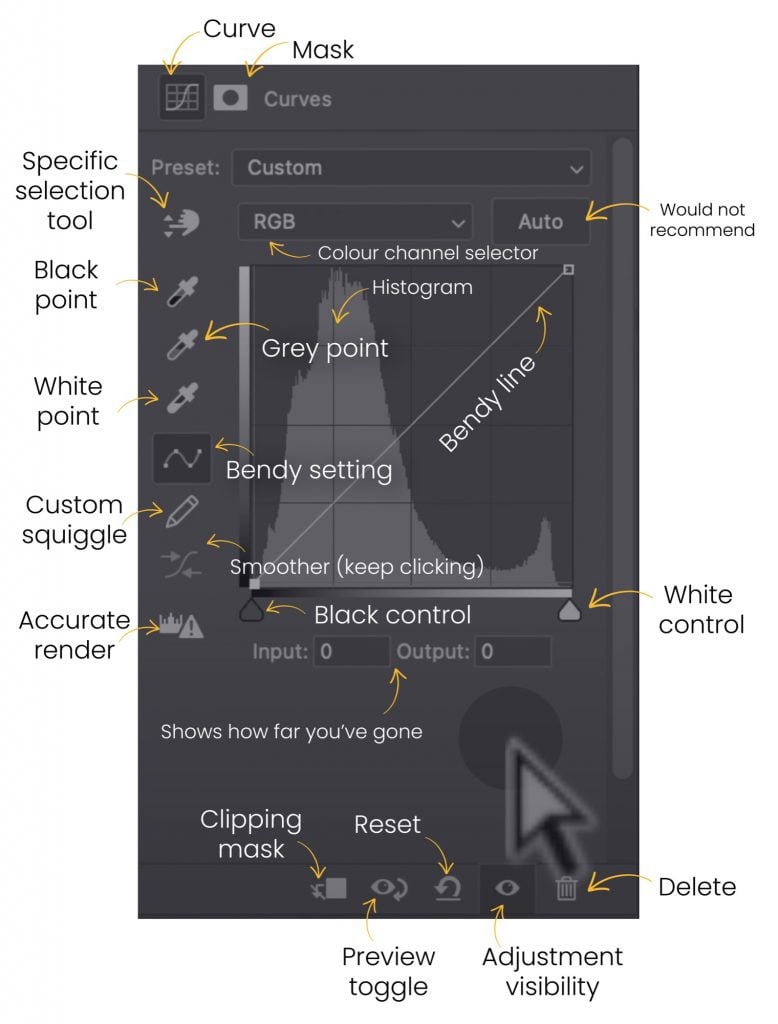
Anatomy of Curves
Don’t be scared of the Curves module itself. I’m going to pop a diagram that is nicely annotated to identify the different parts. You’ll use different parts of the module to apply specific adjustments which we’ll cover further down this post.
Common Curves adjustments
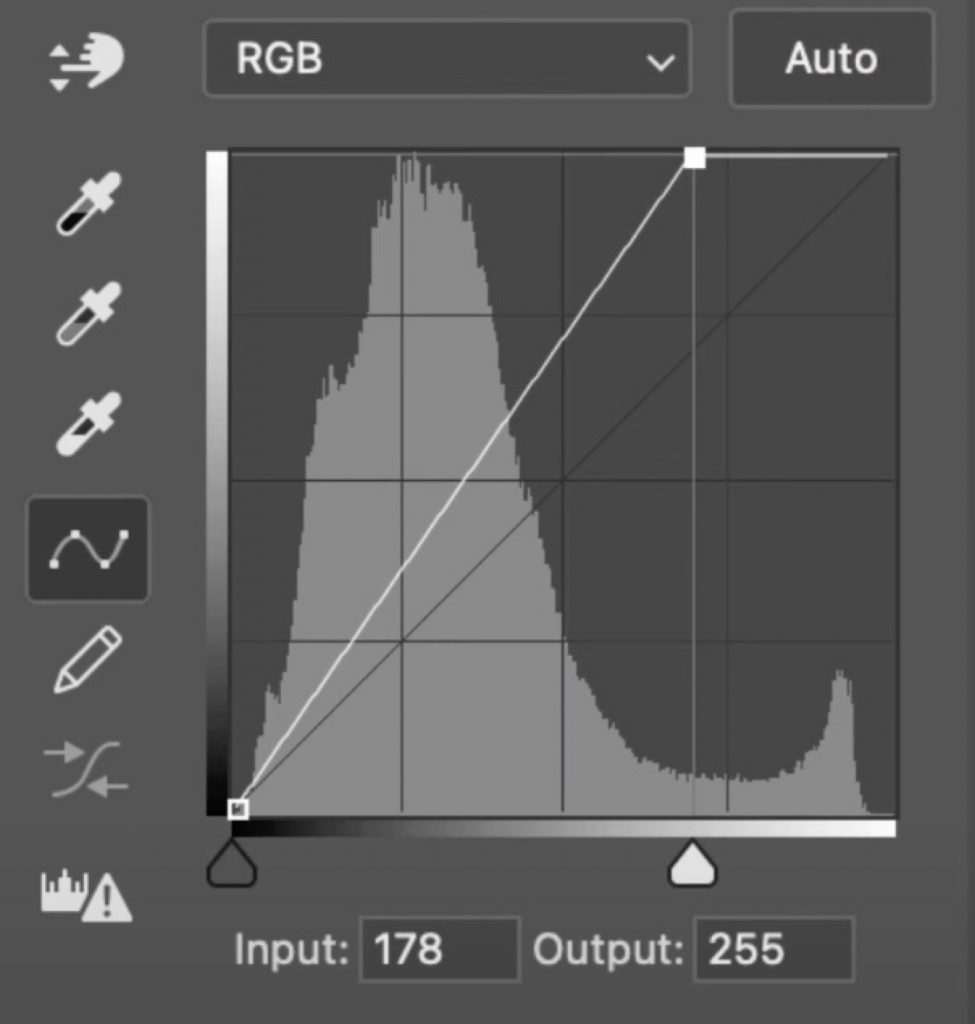
Close the whites gap (aka, the Levels Bump)
This use of curves actually directly replaces levels. We use the ability to close the gaps between the black and the whites to finish an image off at the correct contrast and exposure for viewing or awards.
TIP: Hold down option / alt to see the areas of clipping at the same time as dragging the bottom pins inwards.
Increase exposure
Probably the most common use of curves. To increase the exposure, just grab the middle of the bendy line and pull upwards, left, or both.
Decrease exposure
The exact opposite of the curve shape above, this reduces the exposure of the image.

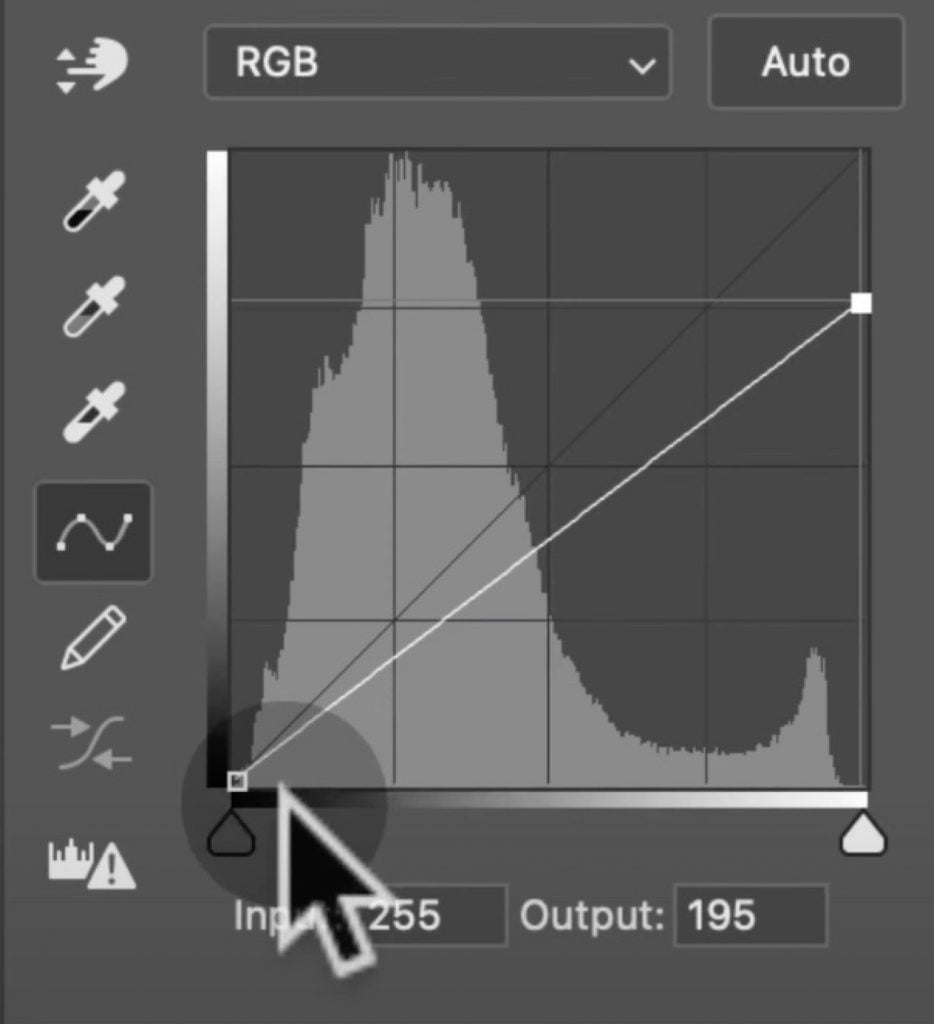
Flatten whites
Useful in certain situations, usually with the assistance of masks for spot treatment, this adjustment relies on you pulling the far right pin at the top of the bendy line downwards.
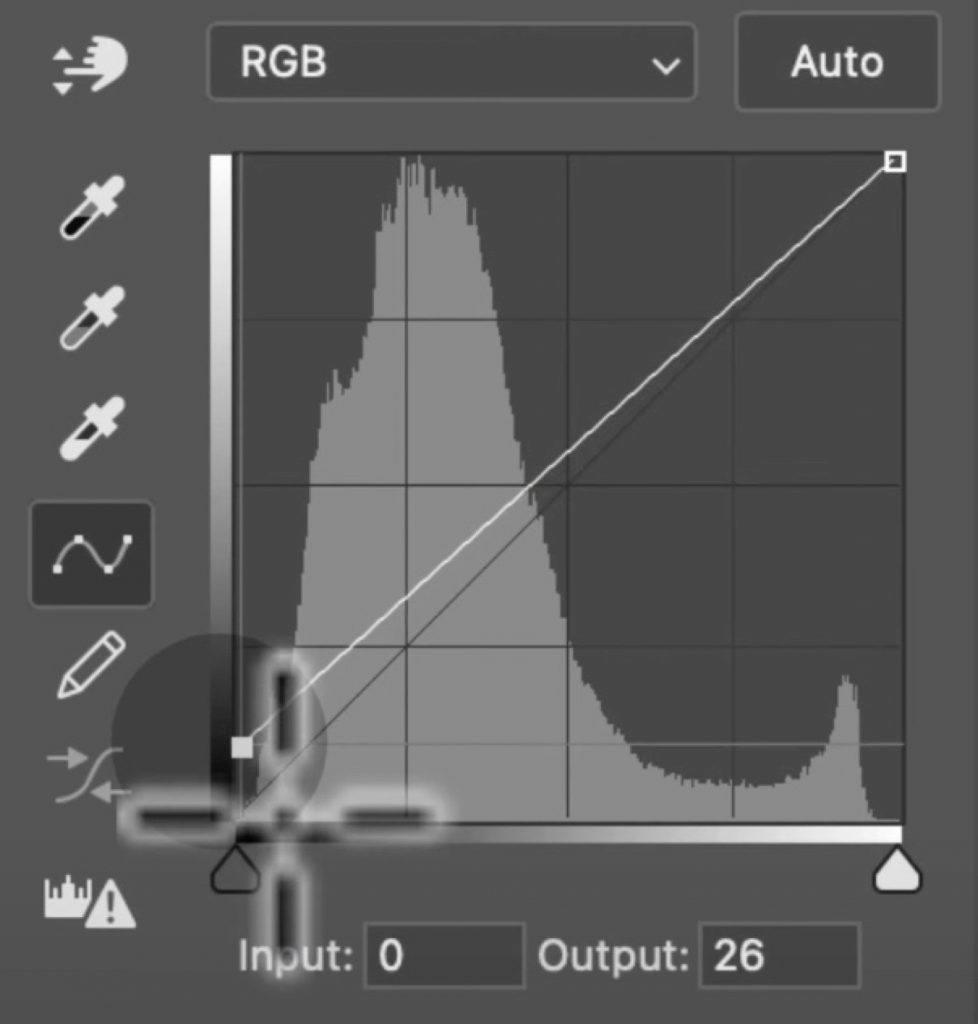
Flatten / Matte blacks
The exact opposite of the adjustment above, you need to grab the bottom right end of the bendy line and lift upwards.
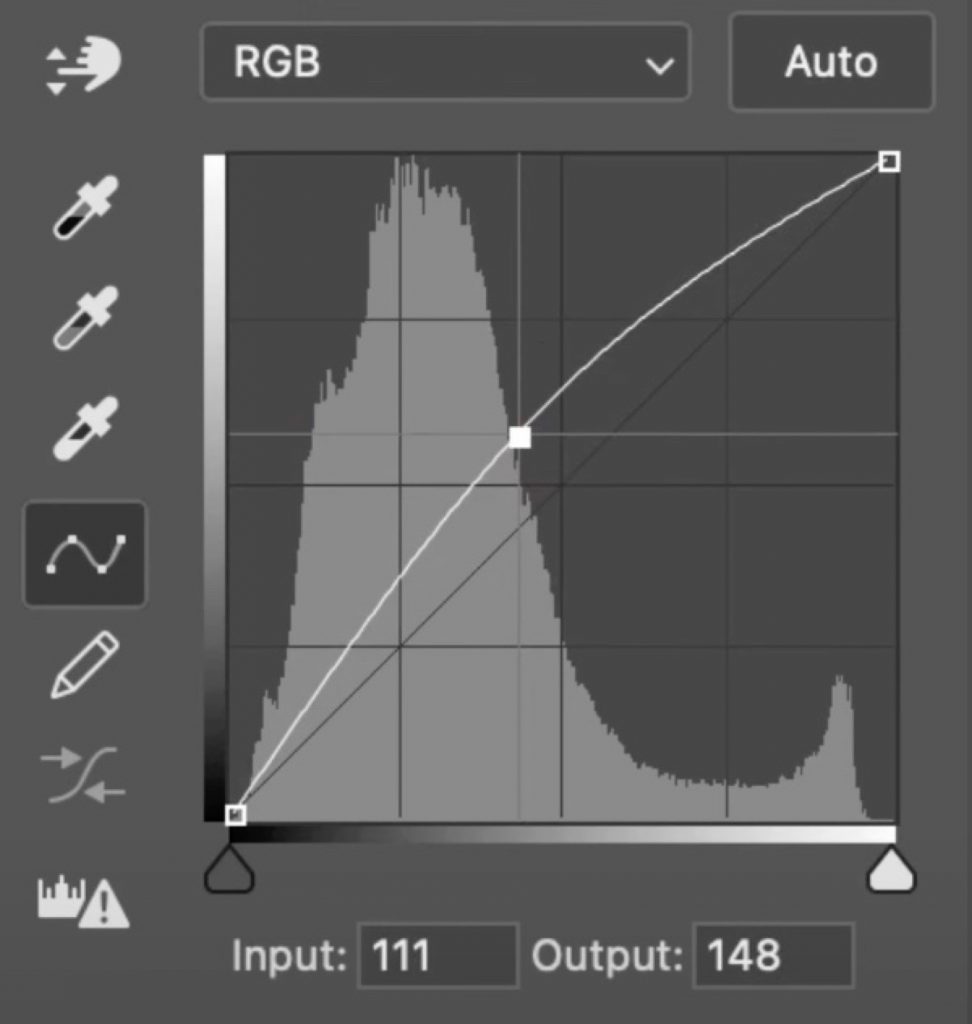
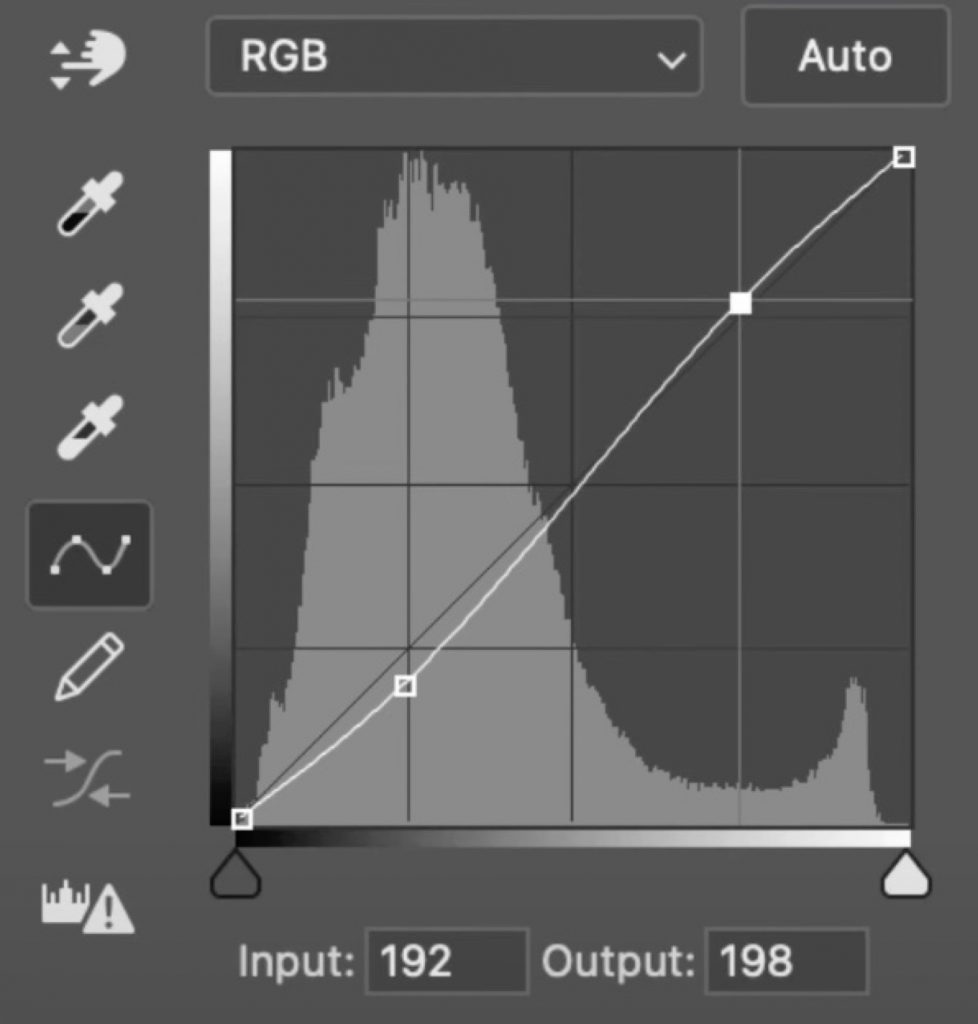
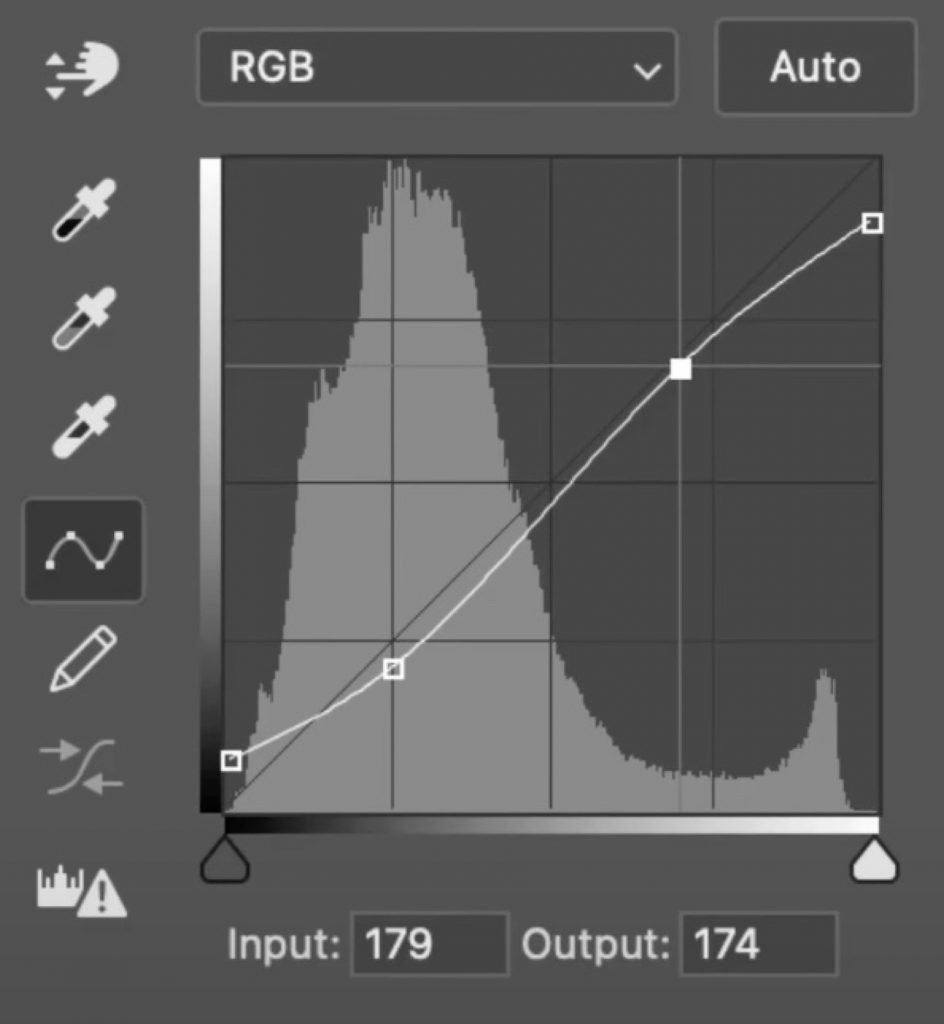
Contrast Curve
One to know, learn, practice, use. This curve is a staple in many circles. All we’re doing is pulling down the shadows and lifting up the highlights. The result is a pop of contrast.
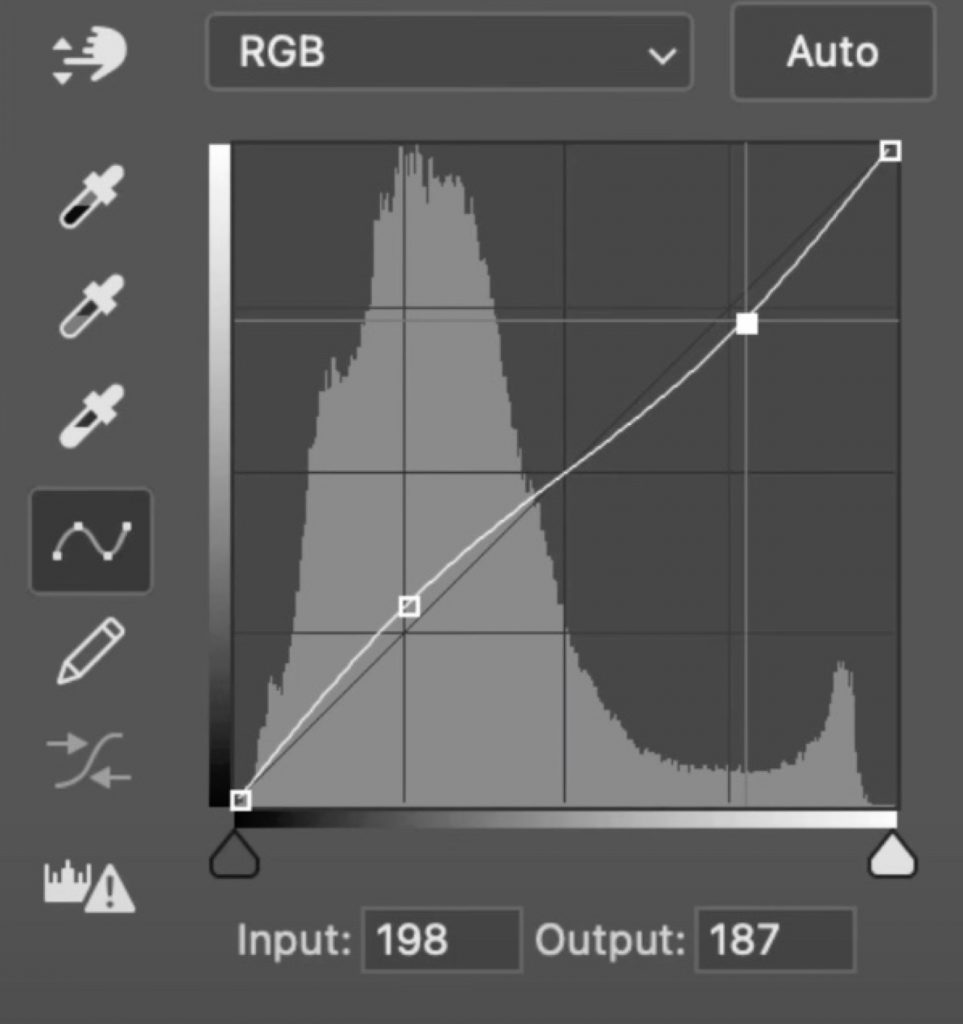
Decontrast Curve
Again, the exact opposite of the curve above, this time to reduce contrast. We lift the shadows and drop the highlights.
White balance (on a neutral area!)
For this one, you need to grab the middle pin on the left-hand side of the curves module and click once on an area in the image that should be middle grey (or white, or black, or whatever – no colour).
Selectively alter areas
Bascially, for this one you just open curves, grab the little hand icon and click and drag, up or down, on areas you want to alter. Only that section of the curve will be altered.
Colour tone
This curve is variable but I like to use the little hand to get a specific tone on my channels. The most common for me is the blue channel, where I lift the bendy line in the shadows (adding blue to the shadows) and pull the bendy line down in the highlights (removing blue, and therefore adding yellow, to the highlights).
You can go to town with this, so have fun and experiment!
Matte style
One I felt best included in here. Lots of photographers, specifically lifestyle, wedding and some portrait photographer people, like a matte look on their images. By applying a curve similar to the one seen below (note the far side pins too!), you can matte your images with uber precise control.
That’s all for this week!
If this post made you feel more confident with Curves, please consider sharing it with others ☺️
Super helpful! Would love to see the full edit of this photo, gorgeous!